
TABLE OF CONTENTS
- Prerequisites
- Tips for new users
- Opening the template (for CSV files only)
- Understanding the logic of the template
- Uploading my file back into erplain
- Error messages
- Import products with multiple integrations
Prerequisites
Tips for new users
Note: Making mistakes on your first time importing products is very common
For your first import, we suggest you to take baby steps and start by importing just a couple products. Therefore, if you make mistakes, you will be able to re-edit your file much faster.
Note: Importing new products will not delete your products already created in erplain.
Downloading the template
From the screen "Import data", select "Products" and click on "CSV" or "EXCEL".

Opening the template (for CSV files only)
Warning: Excel, Numbers an a large majority of spreadsheets are not able to run .csv file in accordance with standards and risk corrupting your file. We invite you to systematically use Google Sheet for your imports.
Understanding the logic of the template
The logic behind this document relies on five items.
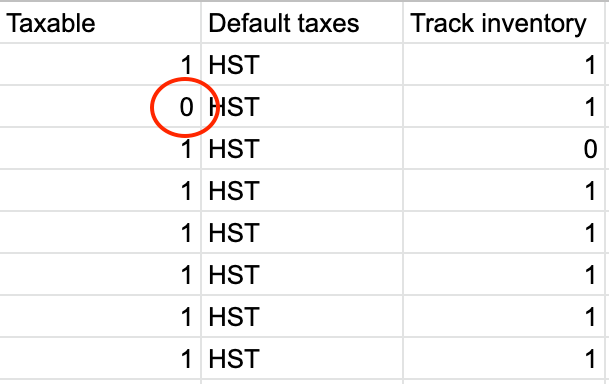
Values 1 and 0: In the columns "Taxable" and "Track inventory", 1 et 0 stand respectively for YES and NO. For exemple for a NON-taxable product, we indicate "0" in the corresponding cell.
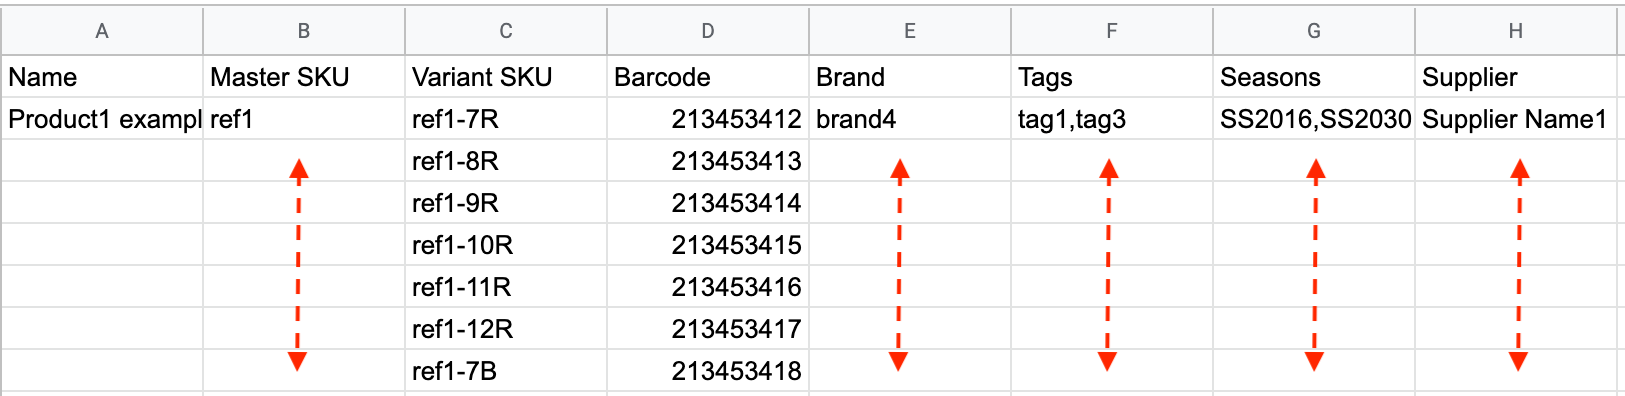
Products without variant: A product without variant is represented on a single row. It has no option or attribute.
Products with variants: A product with variants is represented by multiple rows. Each row represents a new combination of attributes. The first row also contains all the information about your master product (Name, Master SKU, Supplier, Brand, Tags, Season, Description). It is not necessary to enter this information for each variant (every row). However, the other are customizable at the variant level (Variant SKU, Barcode, Weight, Bin location, Quantity, etc).
Taxes: In the column "Default taxes", the data "HST" corresponds to the tax name that is not to be mixed up with the tax abbreviation.
Stock locations: In the column "Stock location", the data "Default location" corresponds to the default stock location created by erplain at the time your account was set-up.
Uploading my file back into erplain


Warning: Once your file is selected, click on "Import products". Do not click on "Update products".
Error messages
Example, with an empty cell in the "Taxable" column:

Import products with multiple integrations
In order to avoid any data transit issue, it is important to take into account the direction in which data moves if you're working with multiple software alongside Erplain.
For instance, if you work with Erplain, Shopify and Pennylane, information goes from Shopify to Erplain then into Pennylane. In this context, you need to sever the direct connection between Shopify and Pennylane as Erplain acts as the intermediary between the software.
Furthermore, it is important to only synchronize your products with one of the software you're using if your product catalogue is uploaded in multiple apps in order to avoid any issues when importing data. A manual mapping between Erplain and the rest of your software will ensure that data moves smoothly across your systems.